Monday 14 May 2012

Please follow me over here...


I have now made the move over to Wordpress. This blog will stay here but won't be updated with new posts, that is happening over here: http://kangacreative.wordpress.com/

Saturday 12 May 2012

Fabric Shopping in Arusha, Tanzania


You may have noticed since I returned from my travels that I have a lot of fabric now for sale.. well in case you were wondering, this is where it all came from. 


In Arusha, Tanzania, in a particular street in the centre of town just near the bus station, are lots of tiny fabric shops.. in alleyways, a small arcade type row of shops with a partially hidden entrance, and also along the busy street. They are visible by the fabric hanging from the rafters out the front and are typically just a very small room with a glass counter at the front (usually filled with batiks or tie dyed pieces). Inside there is barely enough space inside for two people. If you are invited in (which is at most of the shops, the shopkeepers are generally very nice) it is a challenge not to trip over the piles of stock on the floor, the shopkeepers wooden stool, or perhaps even a sleeping baby. If you are not invited in, or if it is just too small, it's a fun game of crazy sign language and pointing to the fabrics you would like to look at while the shopkeeper picks them out. Usually the shopkeeper is very helpful and chooses some for you, that she thinks you will like (and are often way off the mark), so you are constantly having to say hapana asante (no thank you)! After the selections have been made it's a game of bargaing which can take as much time as the choosing. It helps to know how much each type of fabric should be, I was lucky I had a friend come with me who called her friend in the know about such things.


A typical fabric shop, although this one is larger than most. It really was that dark inside, the shopkeeper had to use her mobile phone flashlight to see the fabrics:


Just to emphasise the darkness inside the shop, This photo was taken with f4.8 and a 1 second exposure, and has not been edited:


This is another fabric shop. This is not a wall inside the shop, or just part of the shop. It is the whole shop, it is actually just a shelved wall inside a covered alleyway. On the wall opposite (about 1.5m away) are shelves of shoes, a separate shop.


This part of town is very busy and crazy. I normally would catch one of the local mini buses to town then walk up from there, but I had my baby with me and i was planning to buy a lot of fabric so I took the plunge and drove. This video is just after my first shopping expedition. I thought I'd video the drive on the fabric street by sitting my camera on the dashboard. As you will see it's not for the impatient, or the faint hearted! You can see some fabric shops on the left hand side of the road at the very start of the video, they have fabric hanging in front of them. The times the camera drops is when I was going down and up the big ditches in the road, not running over anything!


Thursday 10 May 2012

A thank you to from Tanzania to some crafty Renmark ladies


After I returned from Tanzania from my last trip in 2011, a lovely Renmark woman donated some craft supplies for my next craft workshops on my next trip. Inside the big bag of crafty goodies was some crochet cotton, with which I thought I would easily learn to crochet and then pass the skills on.. but it didn't work out that way. My squares turned into triangles, and somehow I always ended up with either more or less stitches than I started with. So rather than take over a bag of cotton with no knowledge of how to do anything with it, I put some notices up in my local library looking for people who could crochet them into something useful.


All was quiet, I really thought I'd be stuck with this cotton. But then couple of weeks before my departure I had a call from a lady from a craft group run in the Lutheran Church here in Renmark, with some great news. She and her group, as well as some crafters from the next town Berri, had come together and offered to crochet and knit the cotton, as well as some more cotton they would donate themselves, into very useful wash cloths for the mamas and children of Kesho Leo Childrens Village, an Australian run organisation Food Water Shelter.So just two days before I left Australia they were completed, and I was able to pack a bag of useful washers into my bags!


Thank you ladies! And asanteni sana from all at Kesho Leo x


Tuesday 8 May 2012

A visit to Cradle of Love Baby Home, Arusha, Tanzania


While I was in Arusha, Tanzania last month I had the privilege of visiting the Cradle of Love Baby Home. This is the only orphanage in Arusha which takes in babies, they currently care for around fifty babies and toddlers from newborn up to three years old. The babies are there for a number of reasons, sometimes the mother may have died, or the babies may have been found abandoned, or the families just can not care for them. Some orphans are up for adoption, some will be returned to their families, and others will be transferred to a nearby orphanage which cares for children up to 18 years, the SOS Childrens Village.


Twins Princess and Priketts arrived at the Home as newborns, after their mother died soon after their birth. They were less than two weeks old when I met them, and so tiny. I’m not sure if this is Princess or Priketts, but she is the smaller of the two.  I was told the twins are to be returned to their family when they are a bit older.


Nappies, nappies, nappies! The home needs donations of even more cloth nappies, if I had known I would have taken some with me. Instead I took another much needed essential, baby formula.


Inside the baby nursery, the room which houses newborns to six month olds:


And this is little two month old Francis, who was tragically abandoned by his mother at birth and is for adoption. He fell asleep in my arms while I was feeding him, and I fell a bit in love.


Monday 7 May 2012

One Day In Nairobi with a toddler


I recently had to spend a couple of days in Nairobi with my one and a half year old son on route to Tanzania. Not really because I wanted to, Nairobi does not have a reputation as being one of the safest cities in the world (it also goes by the name Nairobbery, and for a reason), but things just worked out that way.

Nairobi is a big city… polluted, noisy and expensive. I chose to stay somewhere familiar, at the Kenya Comfort hotel. There is no way this hotel could be described as flashy, but it is clean and has the basics – a bed, a tiny bathroom, and if you pay a little extra, a TV on top of a wardrobe. At $70 it is not cheap by African standards, but it is one of the cheapest places to stay in Nairobi.. and they also have free wifi, a 24 hour restaurant, a bar, and a good breakfast for an extra $10. Another plus is that right across the road are the shuttle buses to Arusha, Tanzania, my next destination.

So to make the most of half a day I had free, I decided to hire a taxi and take my son on a little adventure. Close by to each other are the Giraffe Centre and the Elephant Orphanage, both around the outer Nairobi suburb of Karen. The taxi to both cost 3000 KSH return.


First stop was the African Fund for Endangered Wildlife, commonly known as the Giraffe Centre. Here is where a long running breeding program for the endangered rothschild giraffe is in place, and you can even get up close and personal with some friendly giraffes. You can hand feed them, and if you’re lucky, even score a big sloppy kiss. Be warned, giraffe tongues are very long and icky! My son just loved meeting the giraffes, and even held up some of the feed pellets to feed them himself. The centre is very small; there is a café, a souvenir shop, a giraffe viewing platform, an education room and a small tortoise display. Because of the small size, you only need to allow about half an hour to visit here, and a bit longer if you want to get something to eat. There is a low entry fee, and with all proceeds going towards the running of the centre.


Next stop for us was the David Sheldrick Wildlife Trust, also known as the elephant orphanage, which is a wildlife conservation charity  dedicated to the protection and preservation of endangered species such as elephants and rhinos. Orphaned baby elephants are found in the wild are brought to the centre to be raised in a ‘family’ of other orphaned elephants. The babies are mainly orphaned due to poaching, and would otherwise not survive in the wild alone. Visitors are welcome at certain times each day to see the elephants being fed and to hear the story of how the orphanage came about. The elephants are fed in an open setting and the only thing between the spectators and elephants is a single rope, which I discovered does not keep them in! During our visit when it was time for the elephants to be walked back to their private area, some of them managed to walk straight under the ropes and through the small crowd of people. Scary, even though they are babies some of them are very large! The ground is uneven and not paved, so I was very grateful for my Ergo baby carrier here. There is a small range of gifts on the way out, with all proceeds going to the orphanage, and also a small display of baby elephants looking for sponsorship.


There is a saying “this is Africa”, meaning be prepared for anything.. which I was reminded of on our taxi ride back to the city. We got stuck in some unexpected traffic, two to three lanes of cars going nowhere, but cars, mini buses and bikes weaving in and out of each other trying to get ahead anyway. Over an hour later we found out the reason why - a broken down truck, that was it! And as a result, I missed my bus to Arusha and had to stay in Nairobi for another night.


I was more than a bit shocked to see this pull out in front of the taxi! Look closely! Turns out it was a tame cheetah  being moved from one part of Nairobi National Park to another.

Sunday 6 May 2012

I am back.. and it's time to slow down


I have been back in Australia for almost a week now after being away for the month of April, and have lots of things I want to write about. Things like travelling alone with a toddler, the beautiful African fabrics I found, and the sewing workshops I held in Tanzania. I'm not sure where to start! I think I might go through my photos, and start from the start.. expect lots of very random posts over the next couple of weeks! 

On another note, I have decided to slow down my sewing for a while, and use the time to return to studying. My madeit shop will still be open though, and I'll also be selling fabrics on craftumi. I'm not stopping sewing altogether - I'll still need my creative outlet so there will be some new things popping up on my facebook page and in my store occasionally.


Thursday 22 March 2012

Upcycled jeans iPad Sleeves


These are my latest creations, five iPad sleeves made from the denim from one pair of maternity jeans and some African kitenge fabrics. The jeans weren't worn for long, so the denim is still nice and dark but still softer than new. I loved making these, using the jeans meant I had to be a little creative to be able to cut ten pieces the same size from different parts of the jeans. It was fun to pair the pieces them up, matching front to back and then to add a piece of colourful kitenge cloth (Afircan fabrics) in a different place on each one. I left the pockets fully functional and added a snap closure. I then lined them with some lovely soft minky left over from making baby blankets, which has made them a little bit padded and lovely and soft to protect the screen. Oh and I have been told this size pouch is also perfect as a nappy wallet!


Wednesday 21 March 2012

How I made my vegan palm oil free soap


This is my first batch of soap I have ever made. I decided make my own when I was having trouble finding soap not containing beef fat (tallow) or palm oil. If you're unaware of the devastating effects palm oil harvesting is having on the orangutan population, I urge you to do some reading. I was very surprised to find out the other names of palm oil, and instantly recognised them as I have read them on so many products.

Anyway, back to the soap. It was fairly easy to make, and I found all the ingedients I needed at my local supermarket. Lye, used in all soap recipes, is actually caustic soda, found in the laundry section for around $3-4. I used olive oil, organic coconut oil, and a little castor oil. As organic coconut oil can be a little on the expensive side, alternatively you could use Copha, in the supermarket fridge section. Copha is solidified coconut oil.

The technique is a little messy and time consuming, this batch took me a few hours as it took much longer than I expected to reach 'trace' (where the liquid thickens a little after stirring/blending). The soap has been curing in a cupboard for about six weeks but I think it needs to cure a bit longer, as it's still a little bit soft. It does lather nicely though, and leaves my skin feeling very soft.

Here are the links I used, for the recipe and technique:

http://www.soaprecipes101.com/homemade-soap-recipes/soap-recipe-for-beginners/

http://www.soapdelinews.com/2009/03/lets-make-soap-cold-process-soapmaking.html

I'm looking forward to making more soap, I would love to experiment and use cocoa butter and shea butter in the next batch.

Monday 27 February 2012

8 Simple, cheap and free ideas for making a bare outside area interesting to a toddler

I'll begin by saying my back yard is small. Probably smaller than your living room.. it is also very plain, boring and tree-free. There is no lawn, and no garden bed. Apart from a very narrow strip of dirt along the fence, the whole thing is paved. It is also a rental property, so there's not much I can do to change it. My toddler loves the outdoors, and is at his happiest out in the fresh air, and I would love to be able to give him a large lawn area with a garden for exploring, for growing vegetables, and some trees to climb when he is older. But I have what I have, so to make my tiny space interesting for him, I have had to put my creative hat on. 


Things from nature. I wanted to bring some nature in to our bare space, for little one to feel the different textures, the different weights, uneven objects to stack and sort, the coldness of stones and the warmth of wood in the sun:


 ~ Stones. I found these stones in the local bargain shop for 75 cents per kilo (of course if you are lucky enough to live near a stream you could probably find smooth rocks for free). I placed them in a bright bucket, and when little one discovered them he proceeded to move them one by one into a plant pot, then moved them one by one back into the bucket. 
Cost: stones, $1.50, metal buckets $1 each.


 ~ Pine cones and large seed pods. I found these while we were out walking one day, brought them home and put them in another bright bucket. They get played with every day, mainly used as digging implements. Cost: free.


sorting the stones


 ~ Branches. I found some branches which I intended to cut up into tree blocks. I gave up this project after manually sawing about ten blocks.. it's hard work! So I was left with a couple of branches which I left in the narrow dirt space along the fence, and surprise surprise, they get picked up, closely looked at and dragged around. Cost: free.


sunflowers sprouting
Things that grow. Probably the most obvious things you are likely to find in any normal garden are things that grow. Not mine though (not when I moved in anyway) so I have had to make a bit of an effort to introduce them. Not having a green thumb has made it a bit of a learning curve, but now we have lots of growing things; tomatoes, basil, capsicums, cucumbers, baby corn, lettuce, sunflowers, mint, beetroot, rosemary, strawberries, rocket, zucchini, aloe vera, and green beans. Little one loves to sit and watch the strawberry plant, as he now knows that's where his favourite fruit comes from. Sometimes he is lucky and spots one then lets me know (by saying ooh! ooh!) so that I can pick it for him. Beans and sunflowers are particularly good for kids to grow as they grow super fast. 
Cost: about $2-3 for a packet of seeds, $3-5 for a bag of potting mix. Pots starting from $2, Styrofoam boxes for planting, free.


watching the strawberries
Styrofoam fruit boxes make excellent planters.
These are beans.

 Things that move - These two mobiles took maybe 15 minutes each and cost me absolutely nothing. I recycled some old CD's, attached some string I found in my laundry, and made the first mobile last night. Here is a video I found of a similar one in motion. I hung it up at about 10pm last night, and little one was amazed to find it hanging up outside this morning, he kept pointing and saying ooh! I collected twigs for the other one on our walk this morning, and tied them to a length of string. The move gently in the breeze, and are out of reach of little ones hands. Cost: Free.


Recycled CD mobile

twig mobile


Things that are colourful. 


 ~ Bright orange rag rug from the discount shop, because bright colours make a space happy. Cost $4.


 ~ Colourful kids sized chair, because even little bottoms need somewhere to rest. This turns into a step, and was a great garage sale find. Cost: $3.


 ~ Floaty fabric - I found this scarf in an op shop, and bought it for the bright colours. I haven't thought of a use for it until today. I tied a piece of string across my gate, and used it as a line to hang the scarf from using pegs. It floats in the breeze, and also provides a bit of privacy from the street. Also makes a great peek-a-boo playing spot. Cost 50 cents.


So with all of those small things, our outside area has undergone a little transformation. I'd love to hear your ideas too, of any cheap and easy ways to add a bit of interest to your garden. 

Thursday 9 February 2012

Door Stop!


I have had a fantastic suggestion this week of making something like my rattle blocks, but as a door stop! I think it's a great idea, and something I will definitely make for myself, so this afternoon I designed a small, cute fabric door stop with a carry handle. I think I will make more of these to list on my madeit.com.au store, and will use the suggestion of selling them empty with an opening underneath to be filled when purchased, to save postage costs for the customer. They would cost a bomb to post filled!

The first one I made out of African kitenge to go with my crazy mismatched living room. First I put a plastic bag inside the opening at the bottom, just the type of small bag you get from the fruit & veg. I then filled it with lentils (only thing I had suitable in the pantry) but you could use rice, wheat, sand, small pebbles, anything really. After I poured in the lentils, I tied the bag up and pushed the ends inside, sealed up the opening (I will attach snaps to do this neatly), and voila! A unique door stop. 

the empty door stop

with a small plastic bag inside, which will become the lining

pouring the lentils in
and tying up when full

The second one I made from scrap corduroy fabrics, I was happy with the first design so I made it exactly the same. I am thinking of making a triangular shape, maybe..


Tuesday 7 February 2012

Flip Out Sofa Cover - Goodbye Buzz and Woody

after

My little one was given a flip out sofa by his Nan, and he loves it. I think its great too, what I don't love are the huge pictures of Toy Story characters all over it. After looking at it for months and thinking, I really should make a cover for that, this afternoon I decided to get around to actually doing it. I planned to make it out of mismatched African kitenge fabric, three different patterns but then I decided to use only two with some plain dark blue just to tone it down a little. I didn't use a pattern, and it shows, but it does the job. Not using a pattern meant I had to put the cover on before each step, and figure it out along the way. A bit exhausting getting up and down constantly for a couple of hours, but it's something I know I won't need to make again. I know the brightness and boldness of this isn't everyones cup of tea, but it goes pretty well with my colourful little home. And no Disney in sight!

before

Sunday 29 January 2012

Another new banner.


I will be happy with my banner eventually! I have just redone it again, same background but larger and with my facebook and blog details, and have uploaded it to my madeit store. Next on the to do list, writing my store policies. Not the most exciting task in the world, but it has to be done.

Sunday 22 January 2012

Patchwork Bookmark Tutorial


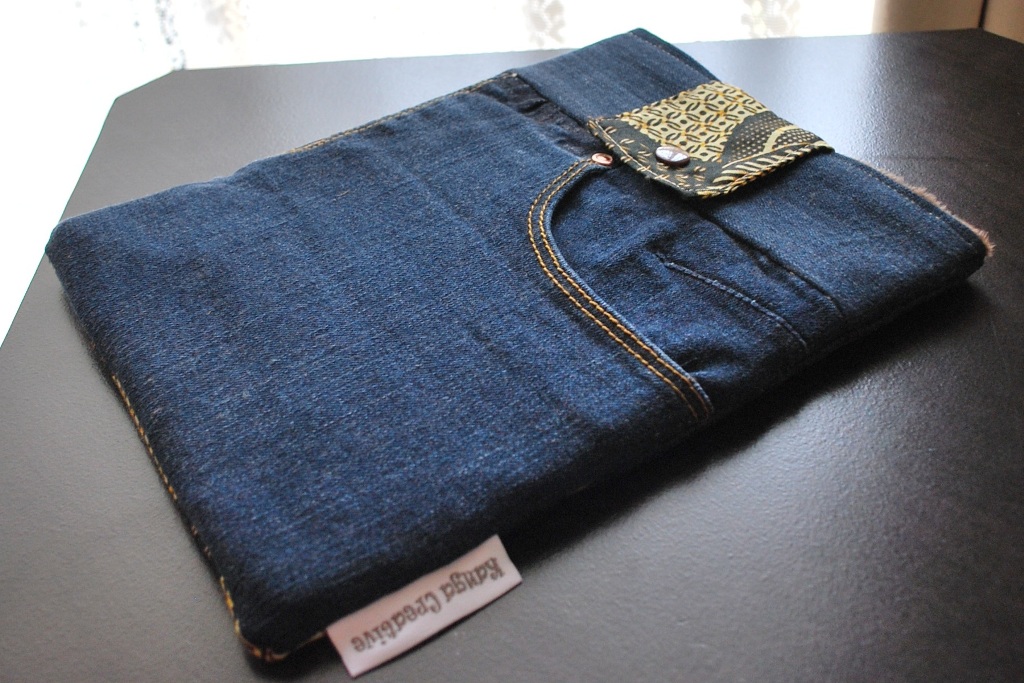
What to do with lots of little fabric scraps? Turn them into a cute patchwork bookmark! This would be a cute gift to pop inside a card for an avid reader, or just to keep for yourself. Here's mine, which will soon be available for sale along with some others in my madeit.com.au shop, and here's how I made it.

You need: scissors, sewing machine, 10cm ribbon, and some fabric scraps. Non-stretchy cotton is best, I used pinwale cord.

1. First decide how wide you would like your bookmark, this will depend on the size of your scraps. My pieces were cut to about 6cm wide, which gave me a 4.5cm finished bookmark. Then cut out your scraps to this width. Different lengths are ok. Use a book to estimate the length.


2. Next, sew two of the pieces right sides together, and keep adding pieces until they are all together in a line. I added an extra piece to mine as the seams made the length too short.


3. Next press the seams open.


4. Cut a piece of 10cm ribbon, fold in half and attach to the top of the right side. Make sure the folded end is pointing down towards the bottom, it will turn up the right way in the next few steps. Sew about 3 or 4 lines of stitching to secure.


5. Lay the patchwork strip face down on larger scrap piece of fabric, which will become the back of the bookmark. My patchwork piece was too long so I just trimmed it a little to fit. Pin right sides together, then sew around the edge making sure the seams remain open. Do not sew the bottom end, this opening will be used to turn it the right way out.


6. Next, trim the corners, and also the edges, then turn inside out.


7. Iron flat, turning the bottom ends in. Then topstitch all the way around, close to the edge. And it's finished!
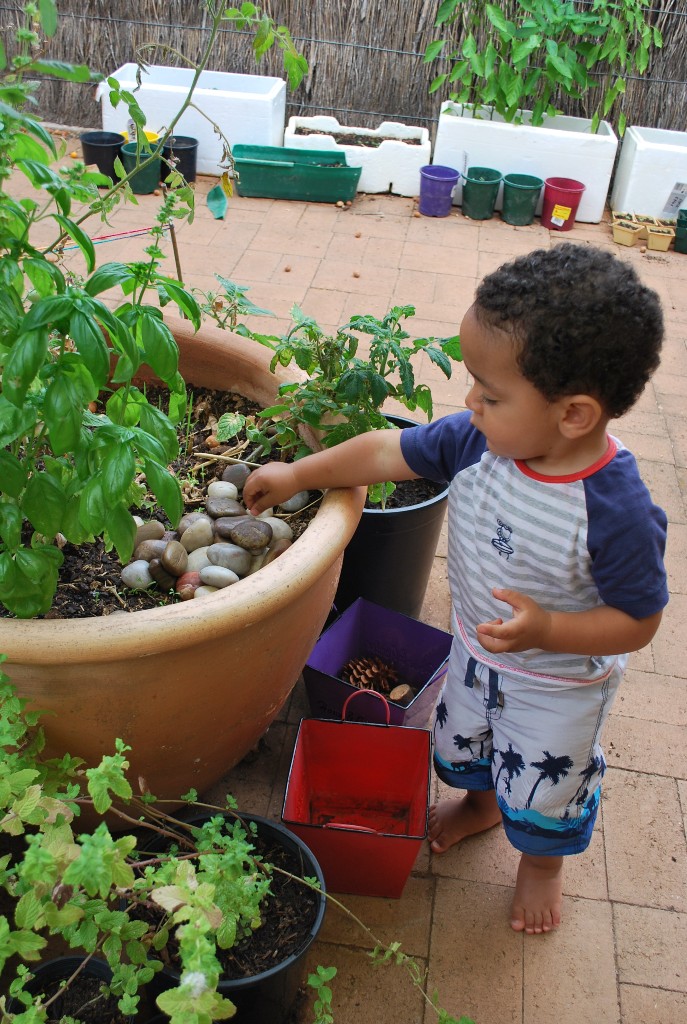